 English
 Deutsch
 Español
 Tiếng Việt
 русский
 عربى

Cable Harness: Applications, Selection Criteria, and Practical Guidance
Content
- 1 What Is a Cable Harness?
- 2 What Goes Into a Cable Harness
- 3 Design: The Steps That Decide Everything
- 4 How a Cable Harness Is Built
- 5 Applications: The Same Idea, Very Different Demands
- 6 Standards, Testing, and the Questions Worth Asking
- 7 Custom Harness or Off-the-Shelf?
- 8 Working With an Experienced Manufacturing Partner
A cable harness is one of those parts that almost nobody notices until something goes wrong. It sits behind the dashboard, inside a medical cart, under the floor of an industrial cabinet, quietly carrying power and signals from one point to another. When it is designed well, installation is fast, wiring errors disappear, and servicing a machine becomes far less painful.
We have been building electronic and automotive harnesses since 2013 at Jiaxing NT Electronic Technology, and in that time we have learned that the difference between a harness that works and a harness that lasts usually comes down to a handful of decisions made long before the first crimp. This article walks through those decisions.
What Is a Cable Harness?
A cable harness, also called a wire harness, wiring loom, or cable assembly, is a group of conductors bundled, routed, and terminated as a single unit. Instead of running individual wires one at a time through a machine or a vehicle, the assembler receives a pre-built unit with the correct lengths, connectors, branches, and protective coverings already in place.
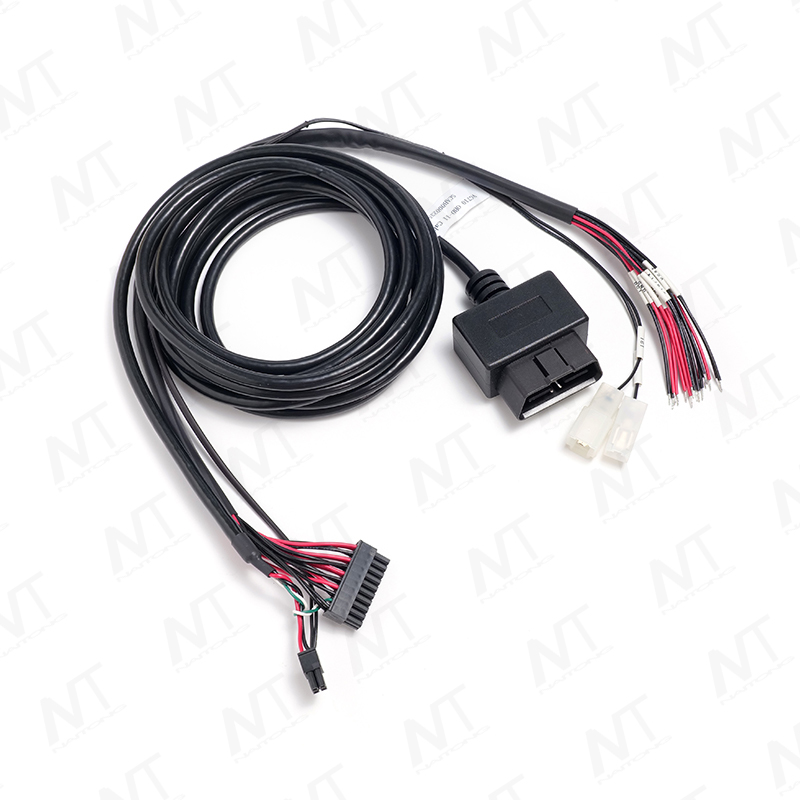
The terms overlap in everyday use, but there is a useful distinction. A cable assembly often refers to a simpler item, such as one cable with a connector on each end. A harness tends to describe something more complex: multiple branches, several connector families, splices, and coverings that protect the bundle against heat, abrasion, or movement. In practice, the boundary is blurry, and most projects sit somewhere in between.
The value of the approach is not just tidiness. Bundling conductors controls routing, reduces the chance of chafing against sharp edges, shortens assembly time on the production line, and makes a machine easier to troubleshoot later. A harness turns a wiring diagram into a physical object that a technician can hold and install.
What Goes Into a Cable Harness
Every harness is a small system, and each layer of that system has a job. The main building blocks are:
- Conductors. Wire gauge follows current, voltage drop, and length, while strand count influences flexibility and resistance to vibration.
- Insulation. PVC, XLPE, silicone, PTFE, and other materials trade off temperature range, chemical resistance, flexibility, and cost.
- Terminals and connectors. Housing families, contact plating, and sealing determine how the harness mates and how well it survives moisture and vibration.
- Coverings. Braided sleeving, spiral wrap, tape, conduit, and heat-shrink tubing guard against abrasion, heat, and electromagnetic interference.
- Strain relief and anchoring. Clips, grommets, and overmolded sections keep the harness from pulling on solder joints or contacts.
- Identification. Labels, color coding, and print markings make the right connection obvious during installation and repair.
Each choice interacts with the others. A heavier gauge may solve a voltage drop problem but make the branch too stiff to route through a tight corner. A sealed connector adds reliability but also adds cost and assembly time. Good harness work is largely the art of balancing these trade-offs against the real environment.
Design: The Steps That Decide Everything
Most harness problems are traceable to a missed requirement rather than a manufacturing error. A disciplined design sequence keeps those gaps from surviving into production.
- Gather requirements. Define the electrical loads, signal types, environmental conditions, mating interfaces, service access, and expected lifetime.
- Select wire and cable. Match conductor size, insulation, shielding, and temperature rating to the conditions the harness will actually meet.
- Route and lay out. Work through the physical path, bend radii, and branch points, then translate the three-dimensional routing into a flat build drawing.
- Choose connectors and terminals. Confirm mating cycles, locking features, sealing class, and whether the contact system is crimped, soldered, or insulation-displacement.
- Plan coverings and protection. Decide where the bundle needs abrasion resistance, heat shielding, or EMI suppression, and where it needs to stay flexible.
- Document everything. Drawings, wire lists, cut lengths, strip dimensions, and test criteria become the manufacturing instructions.
- Build and validate. Prototype the harness, fit it in the real assembly, and run continuity, pull-force, and environmental checks before releasing to volume.
Skipping the prototype stage is tempting when a schedule is tight, but a first-article build is almost always cheaper than reworking a production run.
How a Cable Harness Is Built
On the shop floor, the process follows the drawing step by step: cutting conductors to length, stripping insulation, crimping or soldering terminals, assembling branches on a layout board, applying coverings, and finishing with overmolding or potting where required. Automated cutting and crimping equipment handles the repetitive work with consistent results, while skilled hands manage the routing, taping, and inspection that machines still cannot judge.
Testing is where a harness proves itself. Continuity and resistance checks confirm the right conductor goes to the right cavity, high-potential testing catches insulation faults, and pull-force sampling verifies crimp quality. Visual inspection covers the details that instruments miss: a stray strand, a label in the wrong place, a covering that will rub through in service.
Applications: The Same Idea, Very Different Demands
A harness built for a smart-home controller and one built for an electric vehicle share a basic architecture, but the priorities shift considerably. The table below shows how the emphasis changes by application.
| Application area | Main challenge | Typical construction focus |
|---|---|---|
| Automotive and EV | Vibration, heat, sealing | Sealed connectors, abrasion-resistant wrap, validated crimps |
| Industrial automation | Electrical noise, continuous motion | Shielding, high-flex conductors, robust strain relief |
| Medical devices | Cleanability, reliability, compact size | Fine-gauge wire, biocompatible coverings, tight tolerance |
| Smart home systems | Space constraints, cost control | Compact housings, simplified branch routing |
| Signal and data | Impedance and crosstalk | Twisted pairs, coaxial runs, controlled shielding |
| Motors, chargers, audio | Current capacity, thermal load | Heavier gauge, temperature-rated insulation, secure terminals |
Reading down that column of challenges is a useful exercise for any design team. It quickly becomes clear which requirements are non-negotiable and which are simply nice to have.
Standards, Testing, and the Questions Worth Asking
Harness quality is not a matter of opinion. Widely recognized references such as IPC/WHMA-A-620 describe workmanship criteria for cable and wire harness assemblies, and automotive programs typically layer on additional requirements through quality management systems. Component-level approvals, such as recognized connector and wire listings, matter as well.
When evaluating a supplier, ask which standards the harness will be built and inspected against, how crimp height and pull force are monitored, and what records accompany each lot. Ask to see a first-article inspection report. A supplier who can answer these questions in specifics, rather than in adjectives, is usually a supplier who has done this work before.
Custom Harness or Off-the-Shelf?
Standard cable assemblies make sense when a catalogue part fits the job. Custom harnesses make sense when it does not: unusual lengths, mixed connector families, tight routing envelopes, specific environmental ratings, or a need to reduce assembly time on your own line.
If you are heading toward a custom build, bring as much of the following as you can. It shortens the engineering conversation considerably.
- A schematic or wire list, even a rough one
- The physical envelope and any routing constraints
- Environmental conditions: temperature, moisture, chemicals, vibration
- Preferred connector families or existing tooling
- Expected annual volume and ramp-up plan
- Target cost and any hard deadlines
Working With an Experienced Manufacturing Partner
Our own operation grew out of exactly this kind of practical problem solving. Jiaxing NT Electronic Technology was founded in 2013, initially developing and producing ECUs, sensors, and wiring for new-energy vehicles, and the business has since expanded into a broad range of electronic wire harnesses and cable assemblies. Today our product scope covers automotive and EV wire harnesses, industrial control cables, medical wire harnesses, smart home wiring harnesses, signal and data cables, AC power cords, and general wires and cables, alongside OEM and ODM manufacturing cooperation.
The facility in Jiaxing National High-tech Zone covers roughly 10,000 square meters, with 30 production lines organized by product type and a team of more than 300 people. Automated harness equipment, injection molding machines, and a range of test instruments sit under the same roof as the engineering group, which helps when a design change needs to be proven quickly on the line. Our location, about 50 minutes from Shanghai Hongqiao Airport and an hour from Hangzhou and Suzhou, keeps visits and shipments straightforward, and we also operate a facility in Vietnam.
What that means for a customer is fairly simple: one team can take a drawing through prototype, validation, and volume production without handing the project between unrelated suppliers.
A cable harness looks like a simple object, but it carries the accumulated decisions of everyone who touched the design. Get the requirements right, choose materials deliberately, document clearly, and test honestly, and the harness will quietly do its job for years. If you are working through a harness project and want a second perspective on the design or the build, our engineers are always glad to talk it through.
Recommended Products
Contact Us
 Cooperate with us

Contact Us
-

Telephone:
+86-0573–82791220
+86-0573-83981882
-

Mobile phone:
+86-13736458379
+86-17506661888
-

Email:
shawn.p@jxnaitong.com
ft01@jxnaitong.com
george.cao@jxnaitong.com
-

Address:
No. 2889 Zhongshan West Road, Jiaxing City, Zhejiang Province, China
Factory C7.05, Plot C-7-CN, N17 Road, Bao Bang Industrial Zone Expansion, Bao Bang Village, Ho Chi Minh City, Vietnam.
Copyright © JIAXING NT ELECTRONIC TECHNOLOGY CO., LTD. Custom Wire Harness Solutions Cable Harness Manufacturers OEM/ODM Wire Harness Factory
