 English
 Deutsch
 Español
 Tiếng Việt
 русский
 عربى

Electronic Wire Harness Guide: Design, Types, and Custom Manufacturing
Content
An electronic wire harness is one of those components that nobody notices until it fails. Inside a control cabinet, a medical device, or a vehicle, it is the quiet organizer that keeps dozens of conductors going exactly where they should, without chafing, loosening, or picking up interference. When it is designed well, assembly gets faster and field returns drop. When it is designed poorly, everything downstream becomes a troubleshooting exercise.
We have been building harnesses and cable assemblies at Jiaxing NT Electronic Technology since 2013, starting with new energy vehicle ECUs, sensors, and wiring, and expanding from there into industrial, medical, smart home, and consumer applications. What follows is a practical view of how an electronic wire harness comes together, what decisions actually matter, and how to brief a manufacturing partner so the first prototype is not just a rough guess.
What an Electronic Wire Harness Actually Does
At its simplest, a harness bundles two or more conductors into a single pre-assembled unit with terminated ends. That simplicity hides four jobs the part performs at once. It carries power and signal between boards, modules, and sensors. It fixes the routing so cables cannot drift into heat sources, moving parts, or sharp edges. It reduces assembly time on your line, because one connector pair replaces twenty separate wire pulls. And it moves wiring mistakes away from your production floor and into a controlled, tested sub-assembly.
That last point is often underestimated. A harness built and continuity-tested at the supplier arrives as a verified part. A bundle of loose wires assembled on your line arrives as a possibility.
The Building Blocks of a Harness
Most harnesses share the same short list of components, and the choices within each one drive cost, reliability, and lead time.
- Conductors. Stranded copper is the default for anything that flexes or vibrates; solid wire suits static runs. Gauge follows current, voltage drop over length, and how much heat the bundle can shed.
- Insulation. PVC, XLPE, silicone, PTFE, and TPU each behave differently under heat, abrasion, chemicals, and flexing. The application decides, not habit.
- Terminals and connectors. Crimp quality is where most intermittent faults begin. Housing keying, retention force, and mating cycles deserve as much attention as the wire itself.
- Protection. Braided sleeving, spiral wrap, heat-shrink, and tape all add abrasion resistance but change bundle diameter and bend radius.
- Shielding and grounding. For signal and data runs, foil or braid shielding with a properly terminated drain wire keeps noise out of low-level lines.
- Strain relief and overmolding. Where a harness meets a housing, molded transitions spread bending stress instead of concentrating it at the crimp.
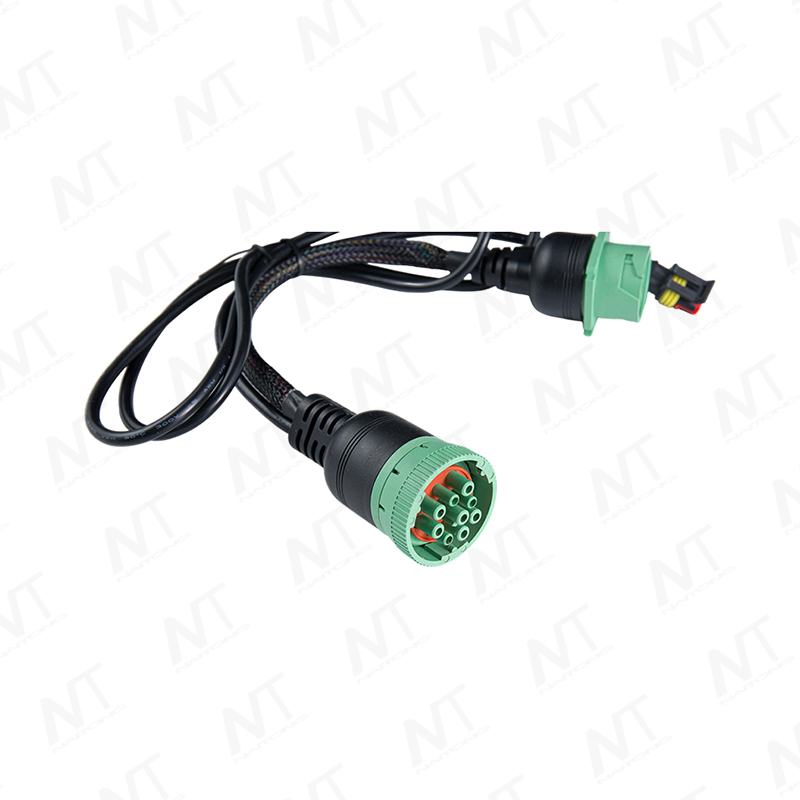
Common Configurations and Where They Fit
Harness architecture tends to fall into a handful of recognizable shapes. The right one depends on how many branches the routing needs, how tight the space is, and whether the assembly will be moving.
| Configuration | What it looks like | Where it usually fits |
|---|---|---|
| Point-to-point bundle | A single run of conductors between two connector ends | Simple board-to-board links and internal power feeds |
| Branched harness | A trunk line splitting into two or more legs with breakouts | Equipment with several modules fed from one source |
| Flat flexible assembly | Ribbon or flat conductors for tight, low-profile routing | Compact devices where height and bending space are limited |
| Shielded signal harness | Twisted pairs or coax with braid or foil and a drain path | Sensors, data links, and noise-sensitive measurement lines |
Matching Materials to the Real Environment
Datasheets describe ideal conditions. Real installations involve vibration, cleaning agents, temperature swings, and people pulling on connectors. We usually work through four questions before quoting anything: what temperature range the harness will see in operation and during any cleaning cycle, whether the assembly flexes in service and how often, what chemicals or fluids it may contact, and how much space the bundle has for bend radius. A harness squeezed into a radius tighter than its construction allows will eventually show conductor fatigue, even if every test passed at build time.
Length tolerances matter just as much. Generous tolerances keep tooling simple, but they can leave slack that rubs or strains a connector. Tighter tolerances cost more in fixture design and inspection. The useful conversation is not "as tight as possible" but "tight enough that assembly is repeatable."
Applications We Build For
Harness requirements look very different across industries, and our product lines follow that split: automotive and EV wire harnesses, industrial control cables, medical wire harnesses, smart home wiring harnesses, signal and data cables, electronic wire harnesses, and AC power cords, alongside general wires and cables.
In automotive and EV work, vibration resistance, connector locking, and traceable process control dominate. Industrial automation leans on shielded signal runs, rugged jackets, and clear labeling for maintenance technicians. Medical equipment demands careful attention to cleaning exposure and to documentation. Smart home products balance compact routing with cost discipline at volume. Across all of them, the design habit is the same: understand the environment first, then pick components.
From Drawing to Repeatable Production
A harness moves through a fairly consistent sequence once the design is settled. Skipping a step usually reappears later as a rework charge.
- Drawing and review. Connector schedules, wire lists, lengths, and bill of materials are checked against the mechanical envelope.
- Prototype build. A small batch confirms crimp settings, breakout positions, and whether the assembly actually fits.
- First-article inspection. Continuity, pull force, dimensions, and appearance are verified and recorded.
- Production. Cut, strip, crimp, assemble, and test on dedicated lines, with in-process checks at each stage.
- Final test and packing. Electrical verification, labeling, and protection for shipping.
Our own plant in the Jiaxing National High-tech Zone runs about 10,000 square meters with 30 production lines organized by product type, staffed by more than 300 people, and equipped with automated harness machinery, injection equipment, and test instruments. The location is practical for visiting teams: roughly 50 minutes to Shanghai Hongqiao Airport, about an hour to Hangzhou and Suzhou, and just north of Wuzhen.
What to Bring to a First Conversation
Good quotes come from good inputs. If you can supply the following, an OEM/ODM discussion moves much faster:
- A connection diagram or wire list, even a hand-marked one
- Expected voltage, current, and signal type per circuit
- Operating environment: temperature, motion, fluids, cleaning
- Mechanical constraints: connector positions, bend radius, available space
- Annual volume and expected ramp, plus any packaging or labeling rules
Missing items can usually be worked out together, but knowing which ones are still open saves a round of prototypes.
Questions We Hear Most
How early should a manufacturer be involved?
Earlier than most teams expect. Connector availability, crimp tooling, and bundle diameter can all push a design change, and those changes are far cheaper on paper than after a mold exists.
Can a harness be cost-reduced without changing function?
Often, yes. Consolidating connector families, trimming unnecessary sleeving, relaxing over-tight lengths, and simplifying breakouts usually recover cost without touching electrical performance.
What is the difference between a harness and a cable assembly?
The terms overlap in practice. A cable assembly typically describes a finished cable with connectors, while a harness usually implies multiple conductors and branches organized for a specific routing. Many parts we build are both.
An electronic wire harness is a small part of a bill of materials and a large part of how reliably a product behaves after it ships. If you are working through a routing problem, a connector change, or a design that needs to move into production, our engineering team is happy to look at what you have and tell you honestly what we would do next.
Recommended Products
Contact Us
 Cooperate with us

Contact Us
-

Telephone:
+86-0573–82791220
+86-0573-83981882
-

Mobile phone:
+86-13736458379
+86-17506661888
-

Email:
shawn.p@jxnaitong.com
ft01@jxnaitong.com
george.cao@jxnaitong.com
-

Address:
No. 2889 Zhongshan West Road, Jiaxing City, Zhejiang Province, China
Factory C7.05, Plot C-7-CN, N17 Road, Bao Bang Industrial Zone Expansion, Bao Bang Village, Ho Chi Minh City, Vietnam.
Copyright © JIAXING NT ELECTRONIC TECHNOLOGY CO., LTD. Custom Wire Harness Solutions Cable Harness Manufacturers OEM/ODM Wire Harness Factory
